
Introduction:
Transform Lydia in Skyrim with this comprehensive guide! Learn how to edit her appearance using the Creation Kit, RaceMenu, and NifSkope for a personalized in-game experience.
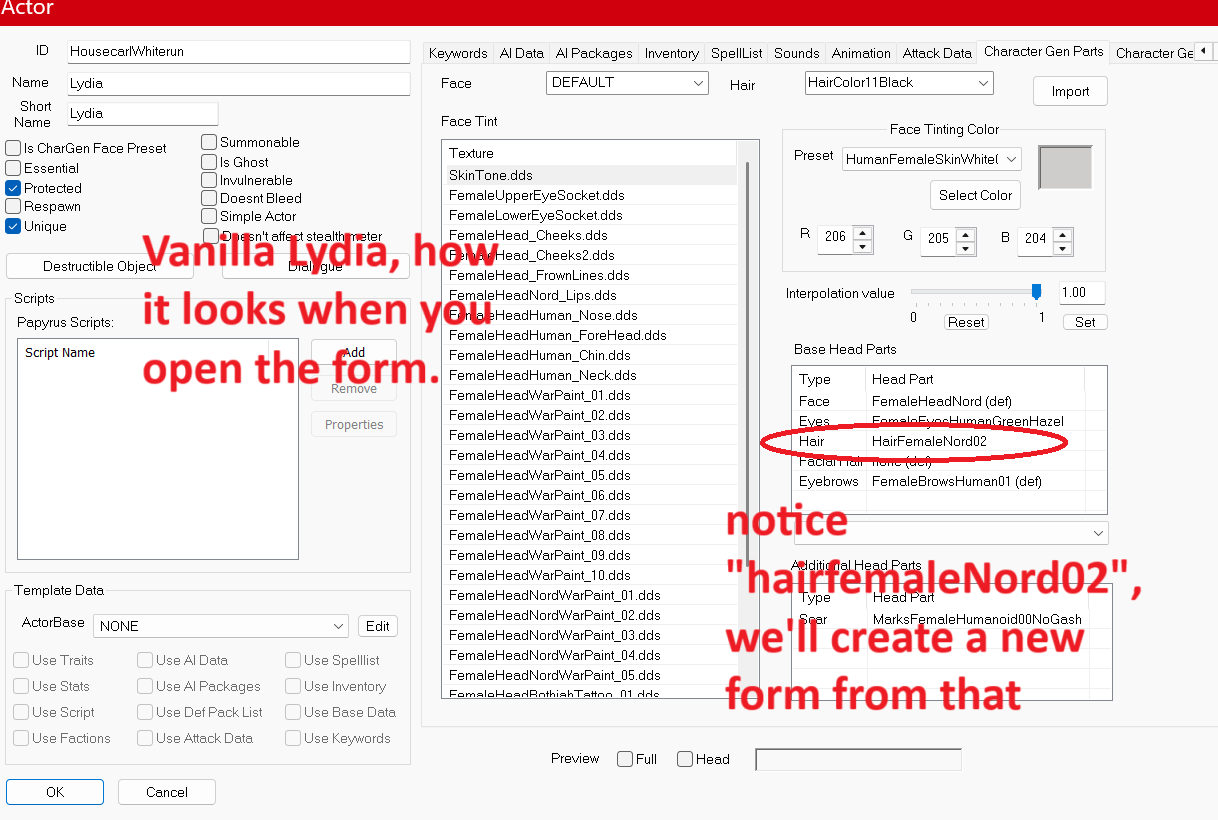
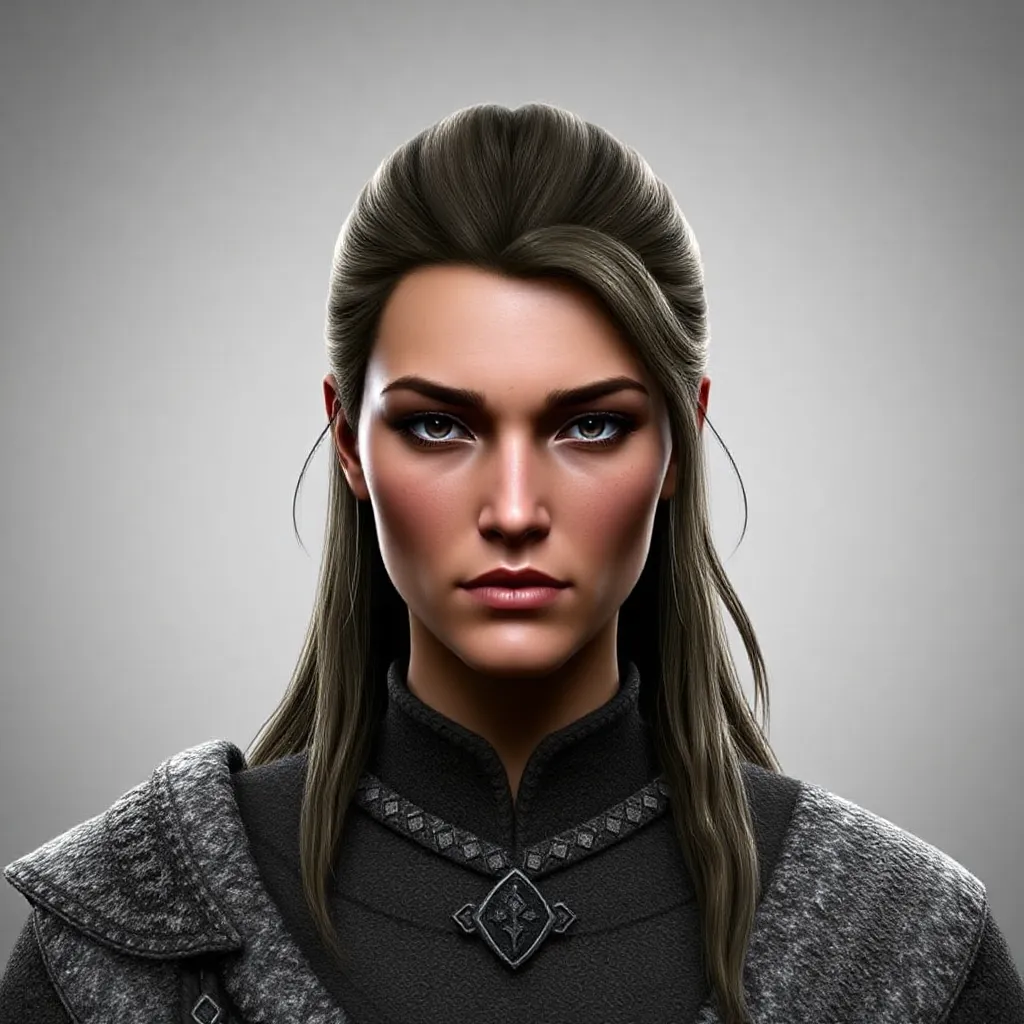
Image 1: Vanilla Lydia
- This is Lydia, as she looks in the game when you open her details.
- In the section labeled “Hair,” there’s a specific type of hair listed called “HairFemaleNord02.”
- The goal is to create a new type of hair based on this one but make it unique to Lydia.
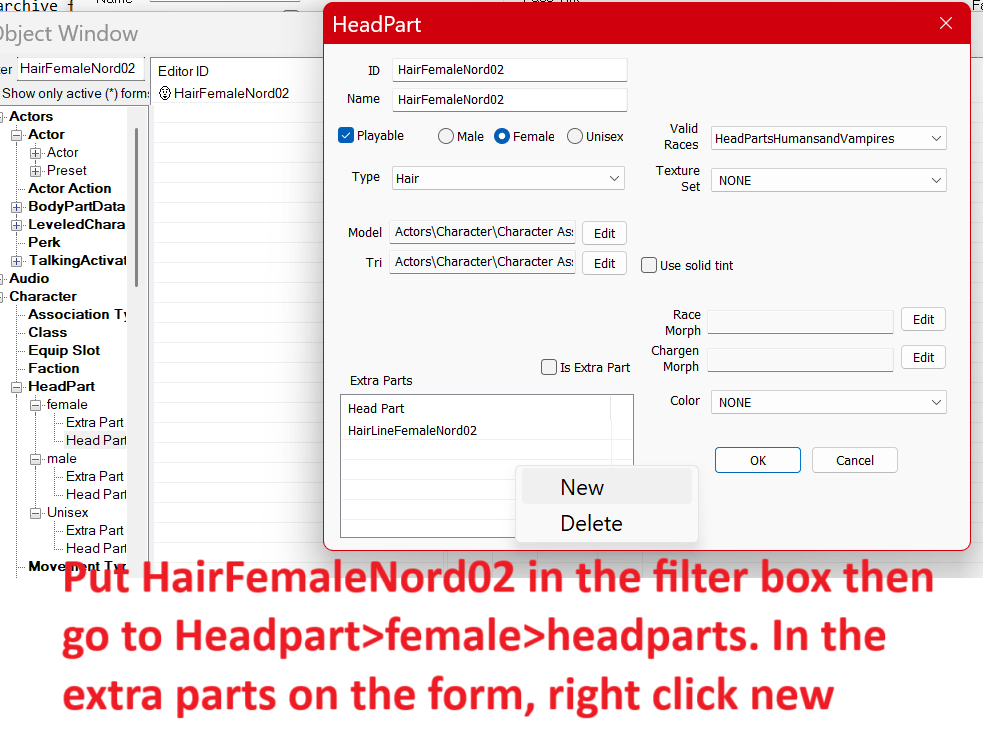
Image 2: Find the Hair Type
- You use the search bar to look for “HairFemaleNord02.”
- Once you find it, go into the “HeadPart” section under female -> headparts.
- Right-click in the “Extra Parts” section to add something new.
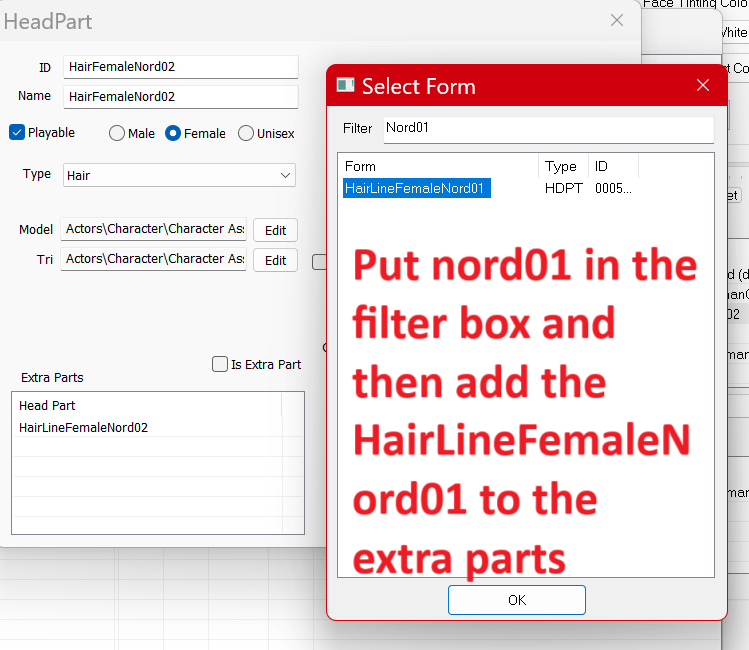
Image 3: Adding Extra Parts
- Use the filter box to find “Nord01.”
- Select “HairLineFemaleNord01” and add it to the “Extra Parts” list.
- This will make the hair look more detailed by adding extra layers to it.
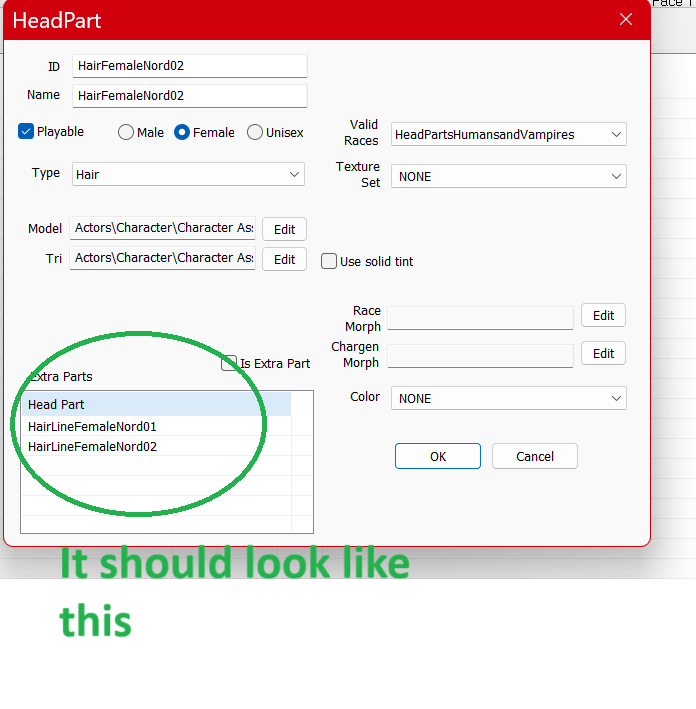
Image 4: It Should Look Like This
- After adding the parts, the list now shows:
- HairLineFemaleNord01
- HairLineFemaleNord02
- This means you’ve added the extra details successfully.
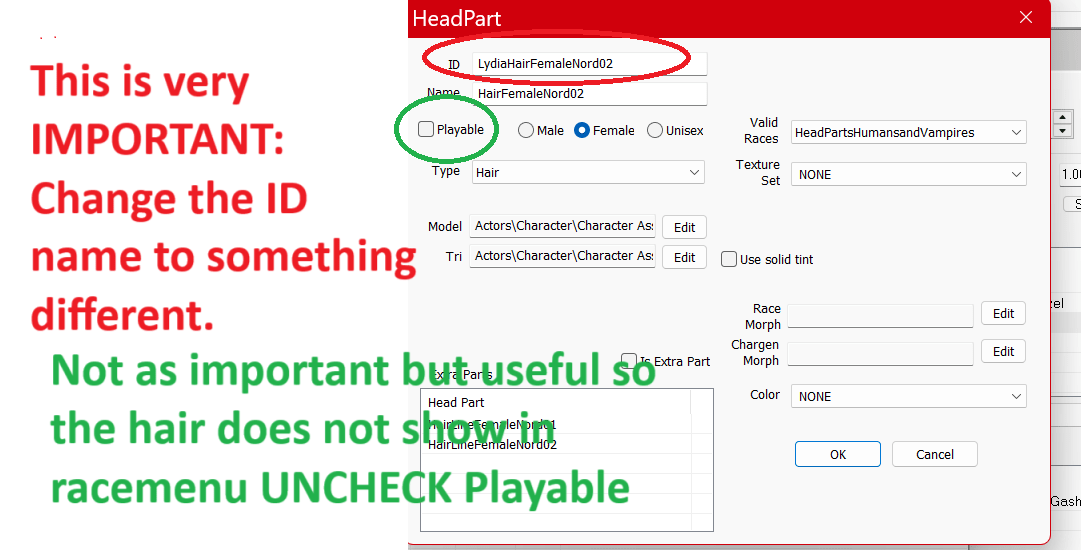
Image 5: Make It Unique
- Change the ID name of the hair to something unique, like “LydiaHairFemaleNord02.”
- IMPORTANT: Uncheck “Playable” so that this hair doesn’t show up as an option for other characters or in the game’s character creator.
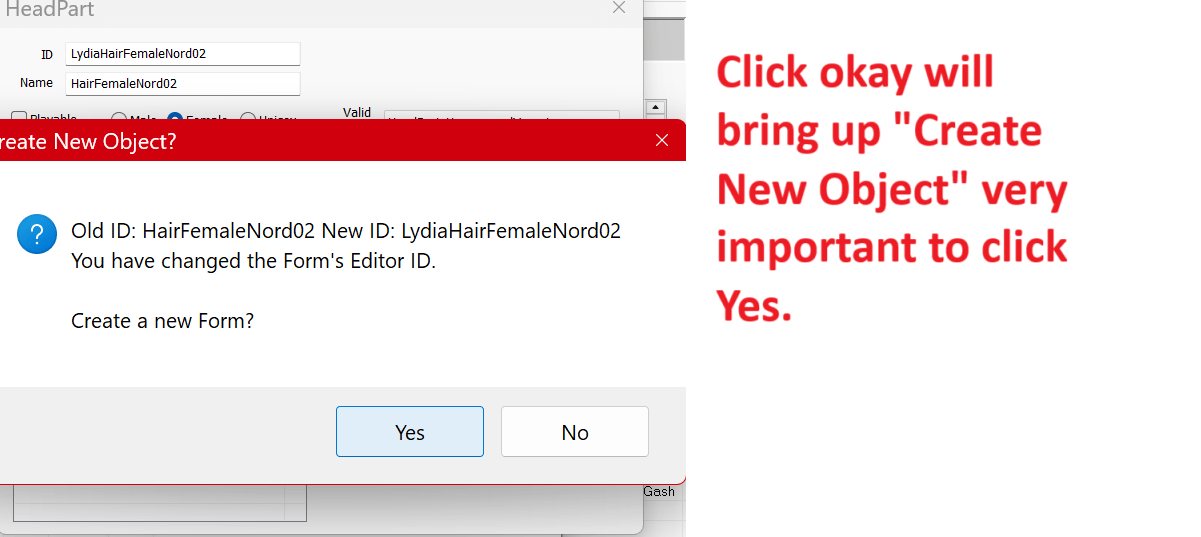
Image 6: Create New Object
- When you click OK, a message pops up asking, “Create a New Object?”
- Always click Yes to make this a unique item for Lydia.

Image 7: Apply the Hair
- Go back to Lydia’s details and drag the new hair (the one you just made) into her “Hair” slot.
- This links the custom hair to Lydia.

Image 8: Generate Lydia’s Face
- Select Lydia from the list but don’t open her details.
- Press CTRL + F4 at the same time to export her face data. This step ensures the game recognizes her new look.
- When it asks if you want to export facegen data, click Yes.
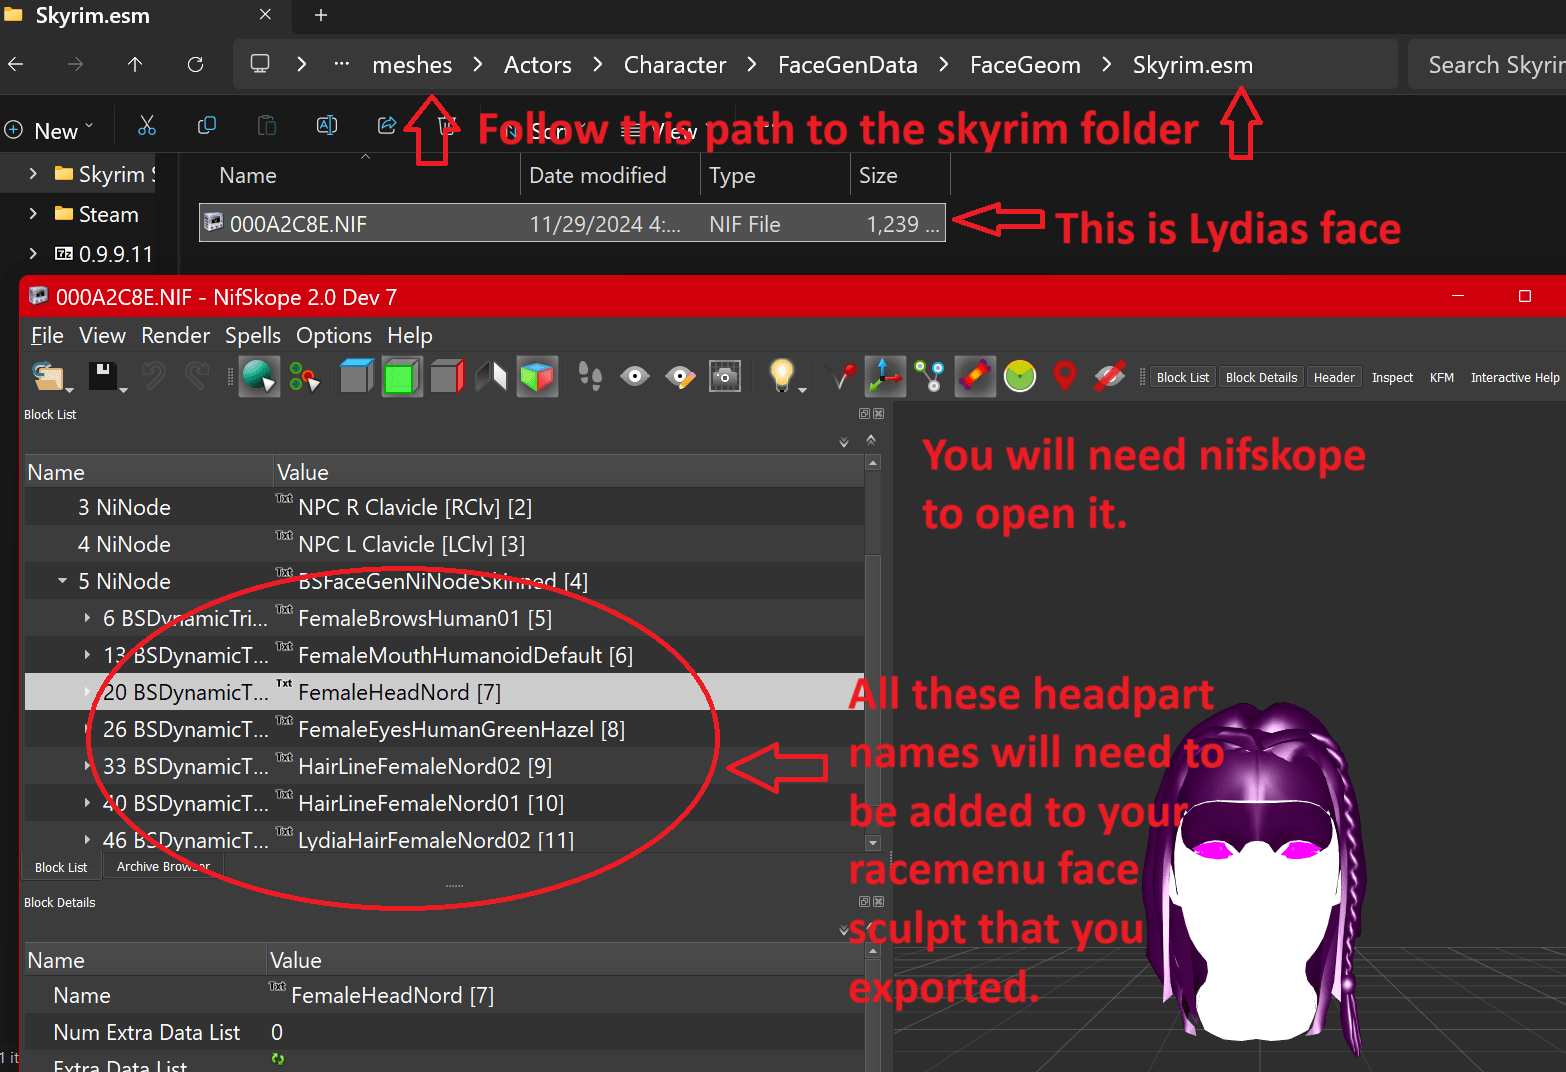
Image 9: Locating Lydia’s Face
- Navigate to
meshes > Actors > Character > FaceGenData > FaceGeom > Skyrim.esmin your Skyrim folder. - You’ll see a file for Lydia’s face (000A2C8E.NIF)—this is her model.
- Open it in NifSkope to edit her details.
- Notice the list of HeadParts (like eyes, hair, etc.)—you’ll need to match these with the RaceMenu sculpt.
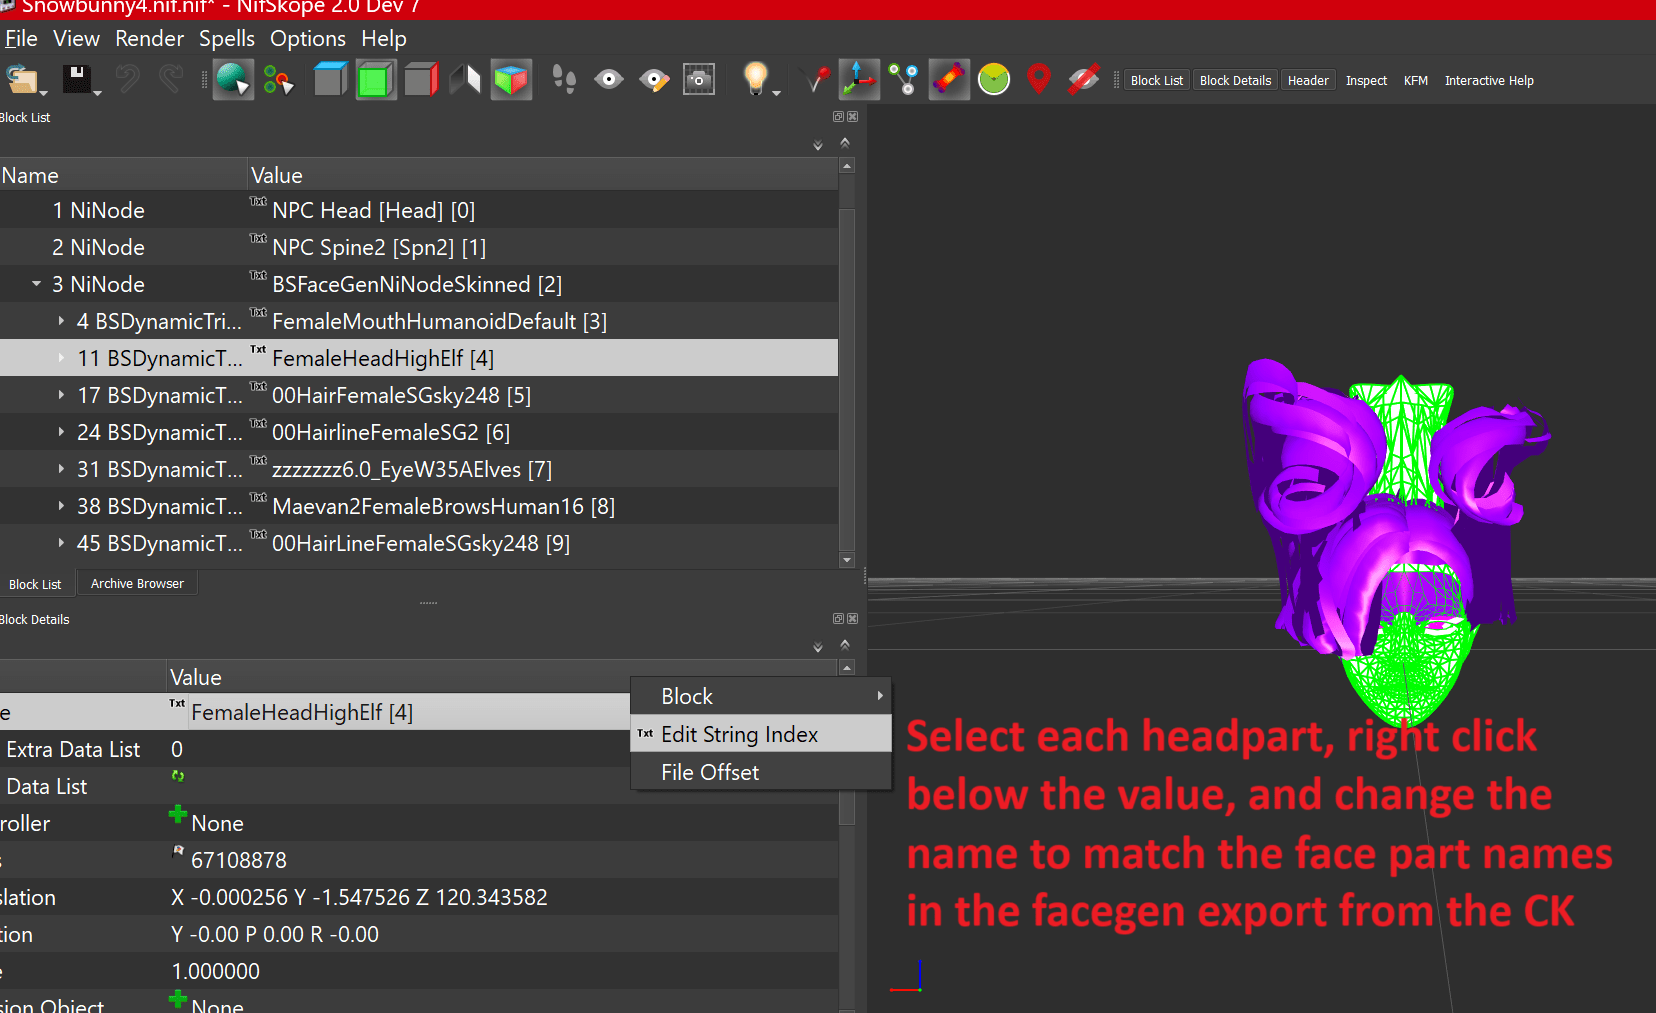
Image 10: Editing HeadParts in NifSkope
- In NifSkope, right-click on each HeadPart under the “Value” column and select “Edit String Index.”
- Replace the names with the matching parts from the Creation Kit (CK) FaceGen export.
- Make sure the names match exactly.
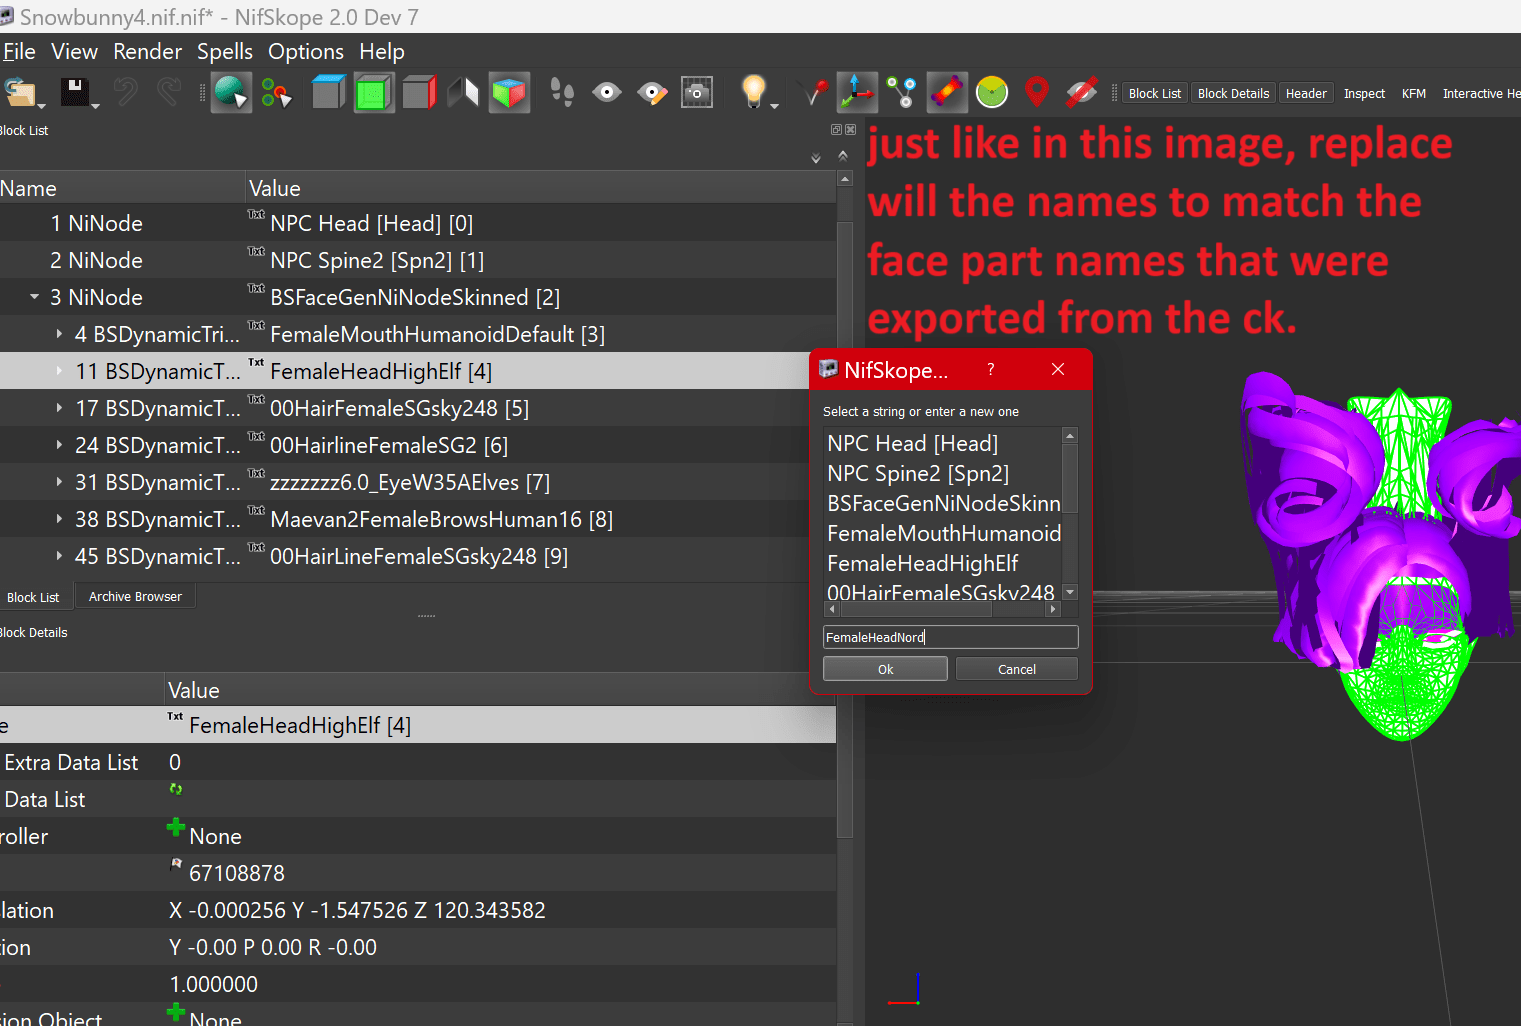
Image 11: Matching Names
- Replace all the HeadPart names in the NifSkope file (e.g., hair, eyes, brows) to match the names exported from the CK.
- Use the window shown to enter the new names one by one, ensuring accuracy.
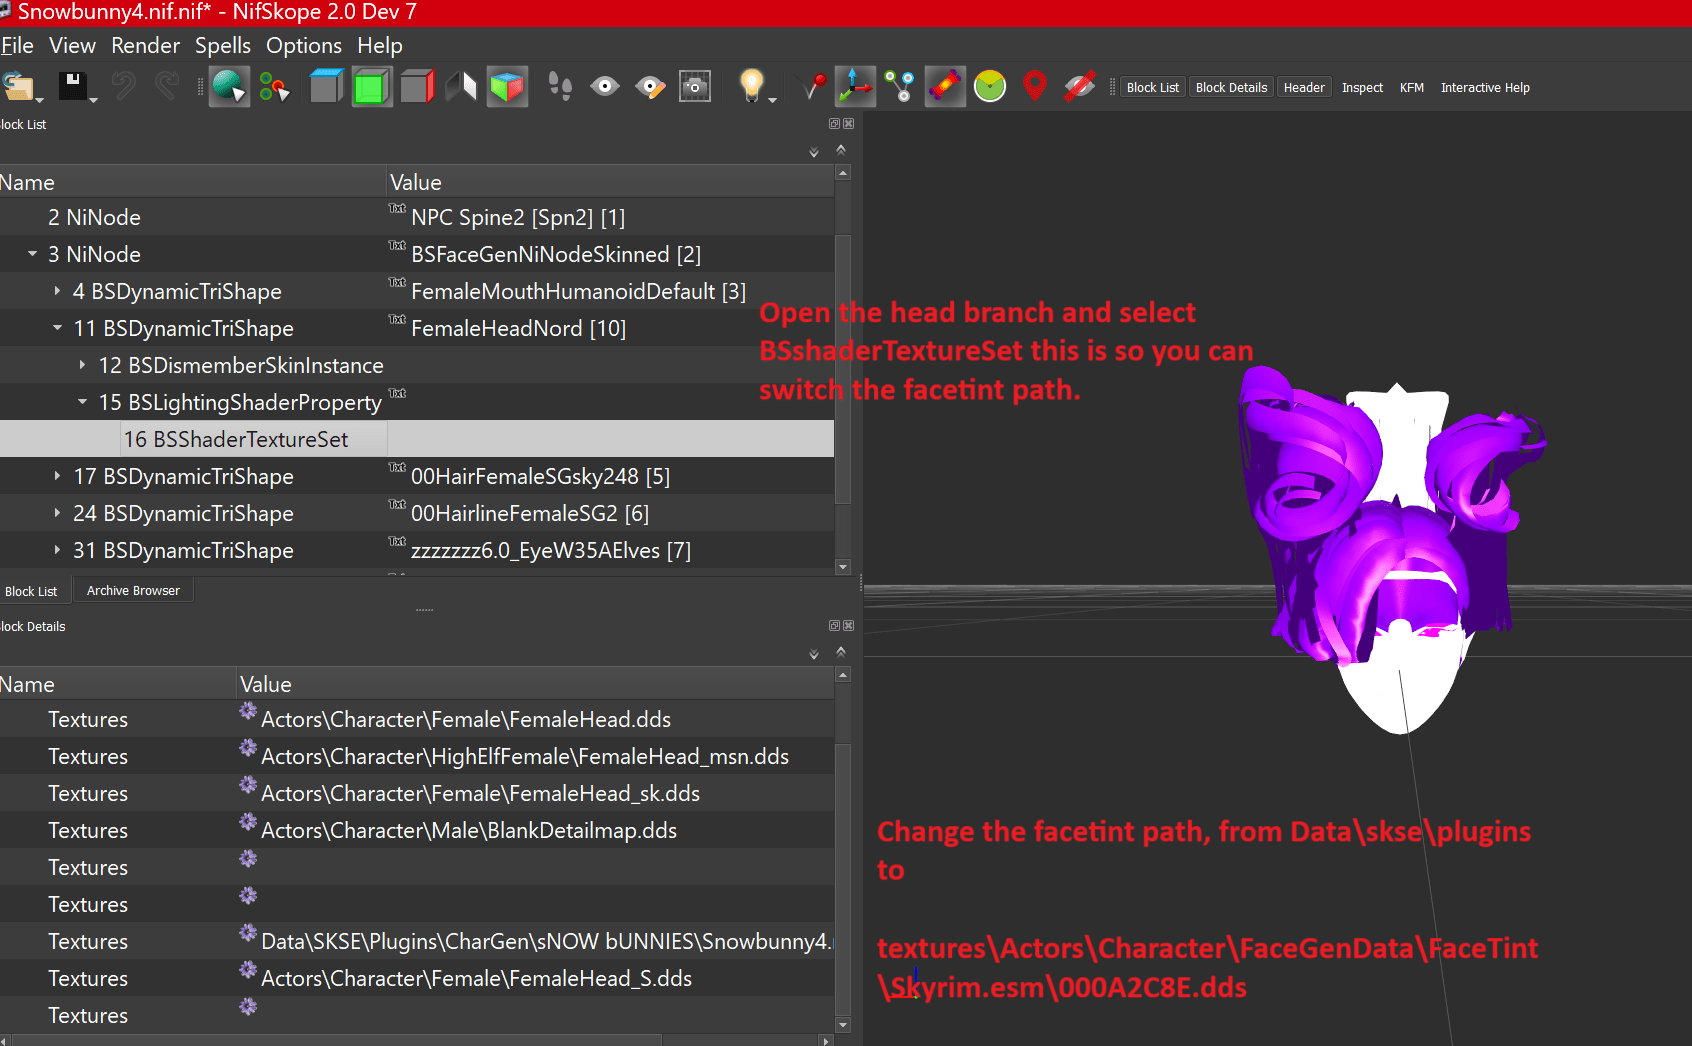
Image 12: Updating the Face Texture Path
- Open the “head branch” in NifSkope and select
BSShaderTextureSet. - Update the texture path for FaceTint to match your exported CK textures:
textures/Actors/Character/FaceGenData/FaceTint/Skyrim.esm/000A2C8E.dds. - This ensures the correct facial textures are loaded.
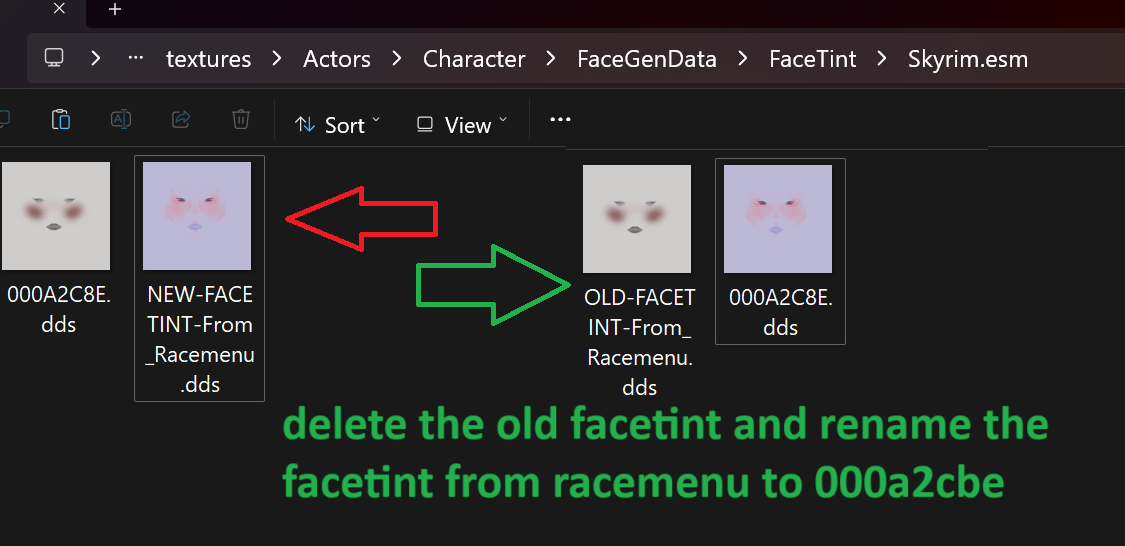
Image 13: Replacing the Old FaceTint
- In your Skyrim folder, navigate to
textures > Actors > Character > FaceGenData > FaceTint > Skyrim.esm. - Replace the old FaceTint file with your new one from RaceMenu.
- Rename the new file to
000A2C8E.ddsto match Lydia’s ID.
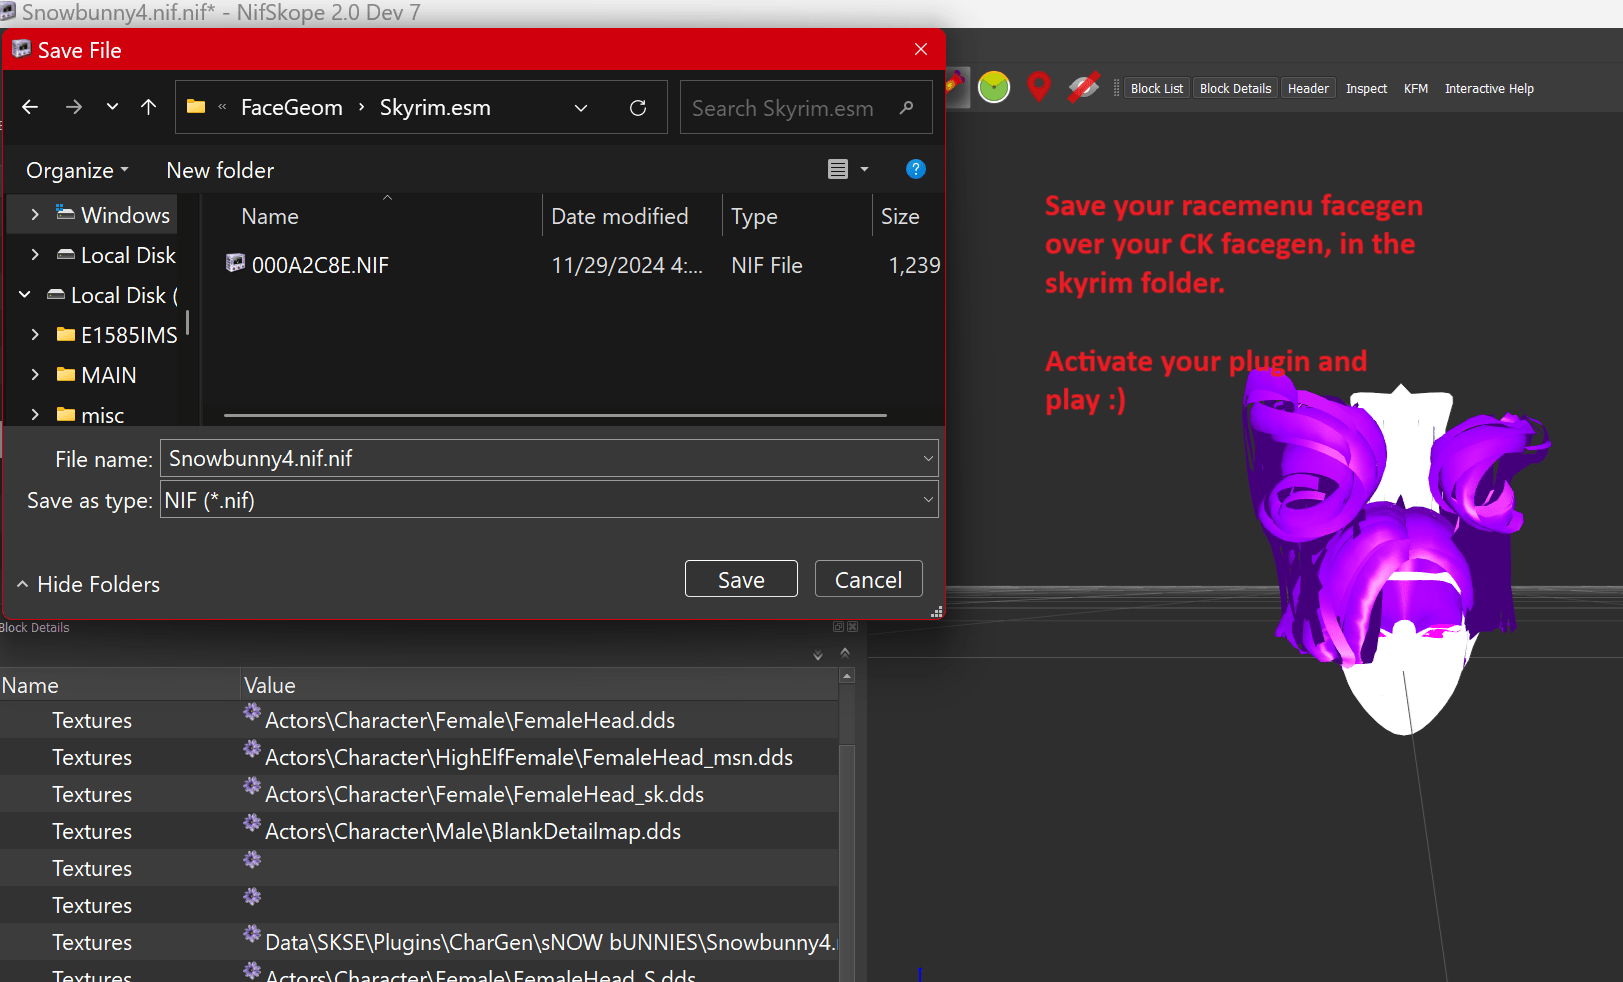
Image 14: Saving the Face
- Save the changes in NifSkope by overwriting the CK FaceGen file with your RaceMenu file.
- Make sure the name stays as 000A2C8E.NIF and save it in the same location.

Image 15: Adding High Poly Head (Optional)
- If using High Poly Head, load the HighPolyHead.esm plugin in the CK.
- Drag the High Poly parts (e.g., head, brows) onto Lydia’s HeadParts.
- Save the plugin and export her FaceGen data by pressing CTRL + F4.
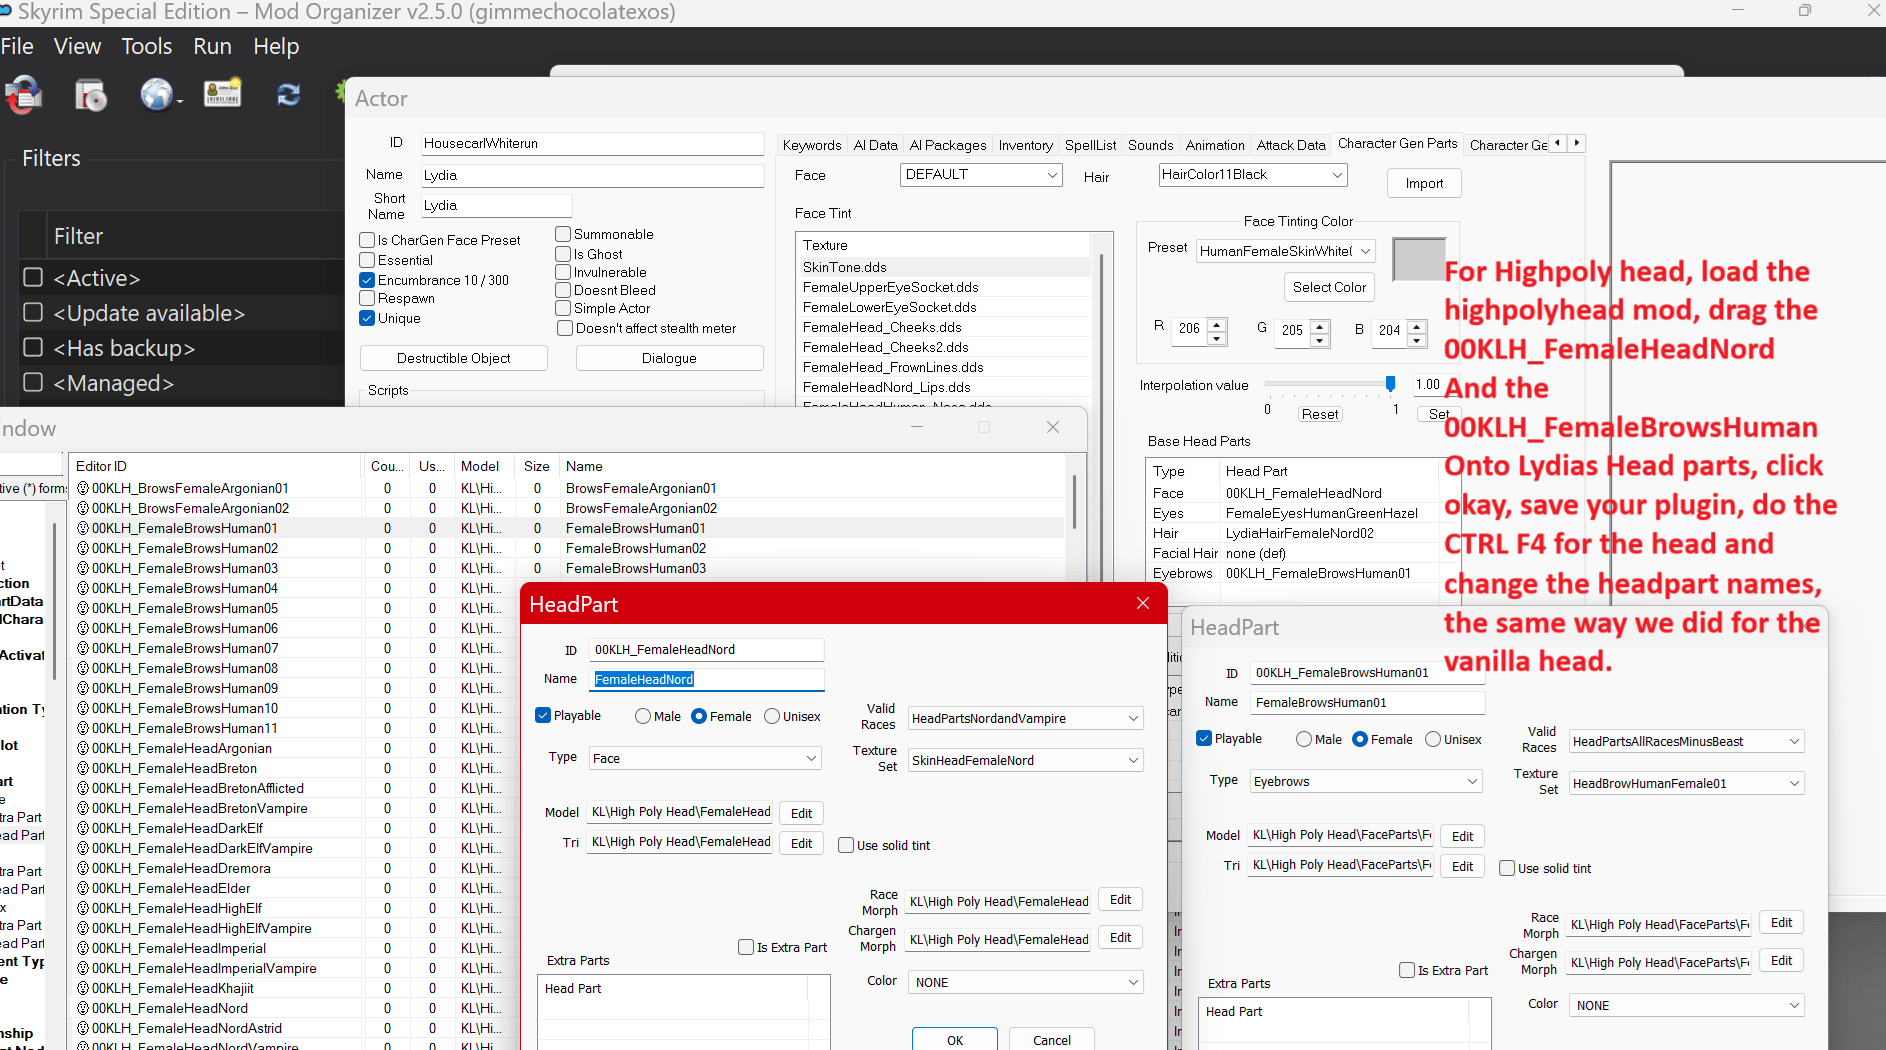
Image 16: High Poly Adjustments in NifSkope
- Open the High Poly NIF file in NifSkope and repeat the process:
- Edit HeadPart names to match the exported High Poly names.
- Update the texture paths to the correct FaceTint file.
Summary:
- After completing these steps, Lydia’s appearance will now reflect the new settings in-game, whether using vanilla or High Poly features.
- Activate your plugin in Mod Organizer or your load order and start the game!